Using the Google reverse image search feature on a computer is a piece of cake. All you have to do is visit images.google.com, click on the small camera icon, and then just paste the URL of an image or upload one from your computer.

After that, simply click the search button and Google
will show you all the websites that used that images, other sizes of
the image, as well as images similar to the one you have searched for.
This handy feature can also be
used on Android devices, and although the process is fairly simple, it
is a bit different when compared to the one described above.
Additionally, there’s also more than just one way to do it, which can
cause confusion for some users.
No need to worry, we have your back. We’ll show how to Google reverse image search on your Android device, step by step.
Google reverse image search option 1: Use Chrome
 |
| mobilerepub.blogspot.com |
The fastest and easiest way to
perform a Google reverse image search on your Android device is by using
Google’s Chrome browser. Let’s say that you’re browsing the web and you
come across an interesting image you want to reverse search. All you
have to do is tap and hold on the image and when the menu with various
options pops up on your screen, simply tap on “Search Google for this
image.”
That’s all there is to it.
Simple, right? To make things even easier for you, we have prepared step
by step instructions below on how to Google reverse image search:
Step by step instructions:
Step 1: Open Chrome and find an image you want to reverse search.
Step 2: Tap and hold on the image.
Step 3: Select the “Search Google for this image” option.
Google reverse engine search option 2: Use ctrlq.org

In case the image you want to
reverse search is saved on your Android device, you’ll have to use a
different tool to get the job done. Head over to ctrlq.org/google/images,
tap on “Upload Picture,” select “Files” and choose one of the images
from your gallery. Once the image is uploaded, simply tap on “Show
Matches,” and you’re good to go.
An important thing worth pointing
out is that you also have the option of taking a photo and reverse
searching it, instead of choosing one that’s already on your device.
Here’s how to Google reverse image search:
Step by step instructions:
Step 1: Visit ctrlq.org/google/images.
Step 2: Tap on “Upload Picture.”
Step 3: Tap on “Files.”
Step 4: Chose an image from your gallery.
Step 5: Tap on “Show Matches.”
Google reverse image search option 3: Use the Search By Image app
If you perform more than one
Google reverse image search for images you have on your device, it’s
probably best to download a dedicated app in order to save some time.
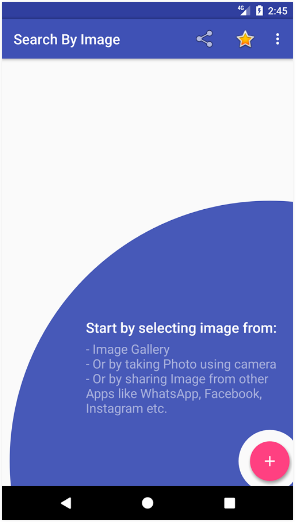
One of the best ones you can use is called Search By Image, which
basically works the same way as ctrlq.org — get it from the Play Store
via the button below.
To perform a Google reverse image
search with the app, just open it up and tap on the + icon in the
bottom right corner. Then just select “Image Gallery,” choose one of the
pictures, and tap on the search button that will bring up all the info
you’re looking for. Just as with ctrlq.org, you can also capture a photo
with the camera instead of choosing one from your gallery. Here’s how
to Google reverse image search:
Step by step instructions:
Step 1: Download the Search By Image app and open it.
Step 2: Tap on the + icon in the bottom right corner.
Step 3: Select “Image Gallery.”
Step 4: Choose an image from your gallery.
Step 5: Tap on the search button at the bottom of the screen.
That’s all there is to it folks.
The process of reverse searching an image on Google is pretty simple,
regardless of which method you end up using. Which one is your favorite?
Let us know in the comments.


No comments:
Post a Comment